

Redimension Elevation puts a fresh set of A+ Tools dimensions on a curtain wall in the elevation or section view you have open — overall, detailed and segment dimensions, with your letter substitutions and text overrides — without creating new views or sheets. Use it after you have changed a wall (moved a grid line, swapped a door, re-divided the panels), or to dimension a wall in an elevation you made yourself.
| Where | A+ Tools tab › Curtain Wall Utilities panel › Redimension Elevation |
| You select | One curtain wall in the active elevation or section view (or several, one after another, in Multiple mode) |
| You get | Overall, detailed and segment dimension chains in that view, with letter substitution and dimension text overrides applied |
| Credits (Free licence) | 5 credits for each wall you re-dimension — see Licensing and credits |
 Before: the panels were re-divided and the old dimensions are gone. After: a complete new set.
Before you start
- Open an elevation or section view. The button is greyed out in any other kind of view (plans, 3D, sheets, schedules, drafting views…). The dimensions are always placed in the view that is active when you start the command.
- The dimension types must exist in the project. If the Overall or Detailed dimension type saved in the settings is missing from the project, the Dimension Settings window opens before you can pick a wall.
- These settings are separate from Create Drawing. Redimension Elevation has its own settings profiles. To get exactly the dimensions your Create Drawing profile produces, load that profile into the Dimension Settings window with the profile bar — see How these settings relate to Create Drawing.
- You need to be signed in (or on a trial). On a Free licence each re-dimensioned wall uses credits.
What is removed and what is created
| Clear ticked | Clear unticked (default) | |
|---|---|---|
| Existing dimensions in the view | The dimensions of the wall you pick are deleted before the new ones are made — every dimension in the view that measures the wall, its grid lines, panels or mullions. Dimensions of other walls stay. | Nothing is deleted. The new dimensions are added on top of any that are already there. |
| New dimensions | Overall, detailed and segment chains for the wall you pick. | Same. |
| Everything else | Views, crop regions, tags, schedules, sheets and the wall itself are never touched. | Same. |
The new dimensions are:
| Dimension | Where it goes | What it measures |
|---|---|---|
| Overall | Above the wall and on its left side | The total width and total height of the wall, outer edge to outer edge. |
| Detailed | Below the wall and on its right side | A chain through every vertical grid line (panel widths) and every horizontal grid line (panel heights). |
| Segment | Below the detailed chain | The total width of each run of glass panels between doors and other panels. Only added when the wall has two or more such runs. |
“Left” and “right” are as you see the wall in the view, whichever way the wall was drawn.
 The A+ Tools dimensions and their offsets from the wall.
Step by step
- Open the elevation or section view that shows the curtain wall.
- Click A+ Tools › Curtain Wall Utilities › Redimension Elevation.
- On the Options bar, decide on Clear (tick it to replace the dimensions that are there) and Multiple. Use Settings to check the dimension settings.
- Pick the curtain wall. The status bar reads Select curtain wall to re-dimension (Press Escape to finish). Only curtain walls can be picked. After the first pick, Multiple, Clear and Settings are locked for the rest of the run.
- Single mode: the command finishes after the wall. Multiple mode: pick the next wall in the same view, and press Esc or click Finish when you are done.
The whole run is one entry in Revit's undo list (Redimension Elevation(s)).
The Options bar
 The Options bar while Redimension Elevation waits for a pick (Revit 2026).
| Control | What it does |
|---|---|
| Multiple | Re-dimension several walls one after another in the same run. Paid plans only — greyed out on Free and trial licences (Multiple mode is only available on paid plans). |
| Clear | Delete the picked wall's existing dimensions in the view before dimensioning it. Unticked by default. |
| Settings | Opens the Dimension Settings window. What you save there is kept even if you later discard the run. |
| Finish | Ends the run and keeps everything, without asking. |
Multiple and Clear are remembered until you close Revit (Multiple is shared with the other A+ Tools commands). In Revit 2027 the same controls appear as an A+ Tools panel on the Modify tab, with a large Settings button.
Tip — Several walls in one view. Clear only touches the wall you pick, so you can tick Clear and Multiple and re-dimension every wall in a view in one run — each wall keeps the new dimensions it just got.
Finishing a run and Esc
- Esc before any wall is done ends the command with no changes.
- Esc in Multiple mode after at least one wall opens Commit Changes? — You have re-dimensioned N curtain wall elevation(s). Choose Yes - Commit changes and finish, No - discard (undoes the whole run) or Continue (Continue re-dimensioning).
- Finish keeps everything without asking.
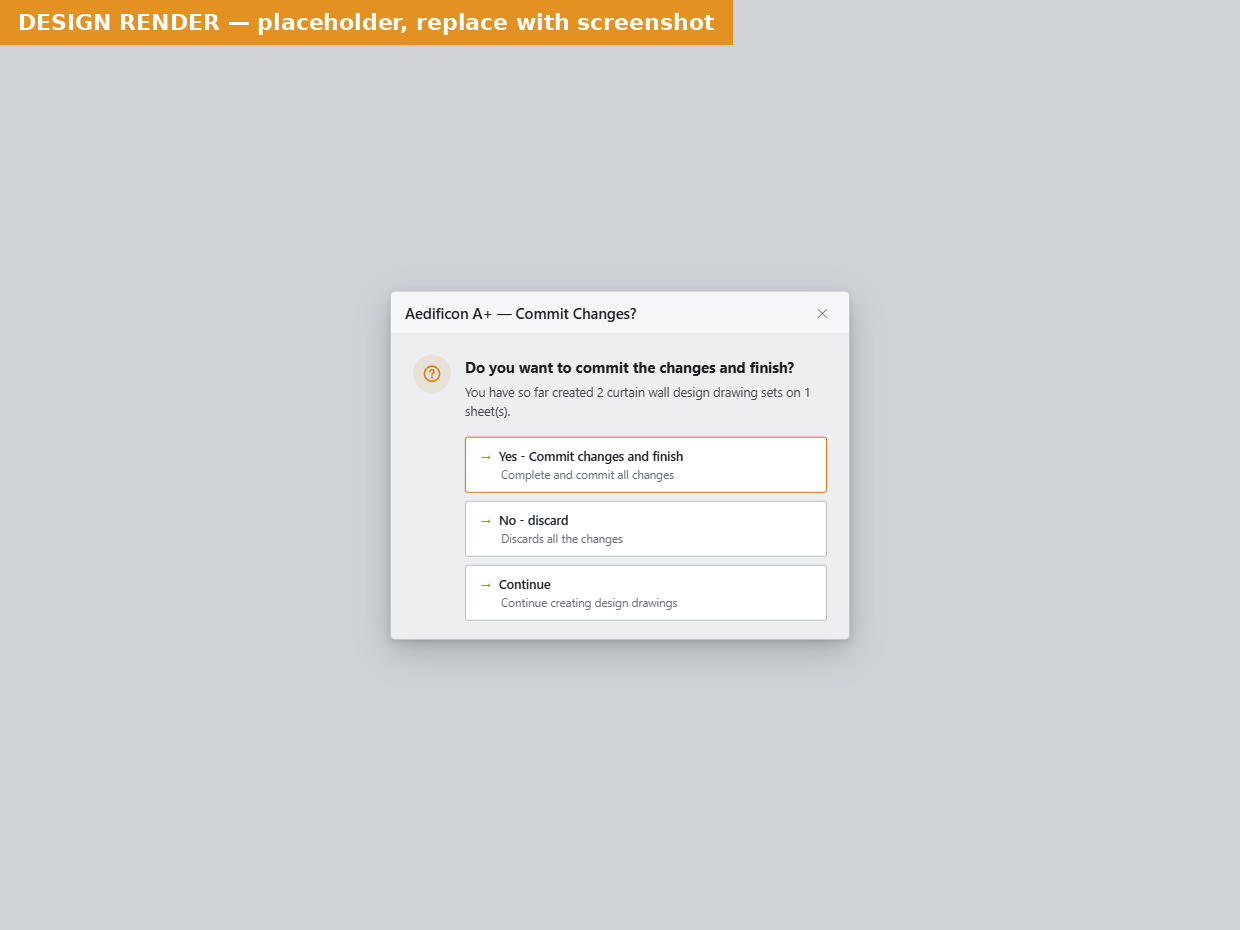 Commit Changes? after pressing Esc in Multiple mode.
Running with a specific profile from the ribbon
When a Redimension Elevation profile has Add as menu item to ribbon switched on, the button becomes a drop-down with one item per flagged profile, a separator and Settings… (Configure this command's settings and profiles, then run it). A profile item selects that profile and runs the command; Settings… opens the Dimension Settings window and runs the command when you click OK. See Settings profiles and repositories.
Settings
The Dimension Settings window
Open it with Settings on the Options bar, Settings… in the ribbon drop-down, from the Settings Manager, or automatically when a dimension type is missing.
At the top is the shared profile bar — choose, create, rename, delete, load and save profiles and switch Add as menu item to ribbon on or off. It is described in Settings profiles and repositories. Below it the window has two tabs.
Tab: Dimension Types
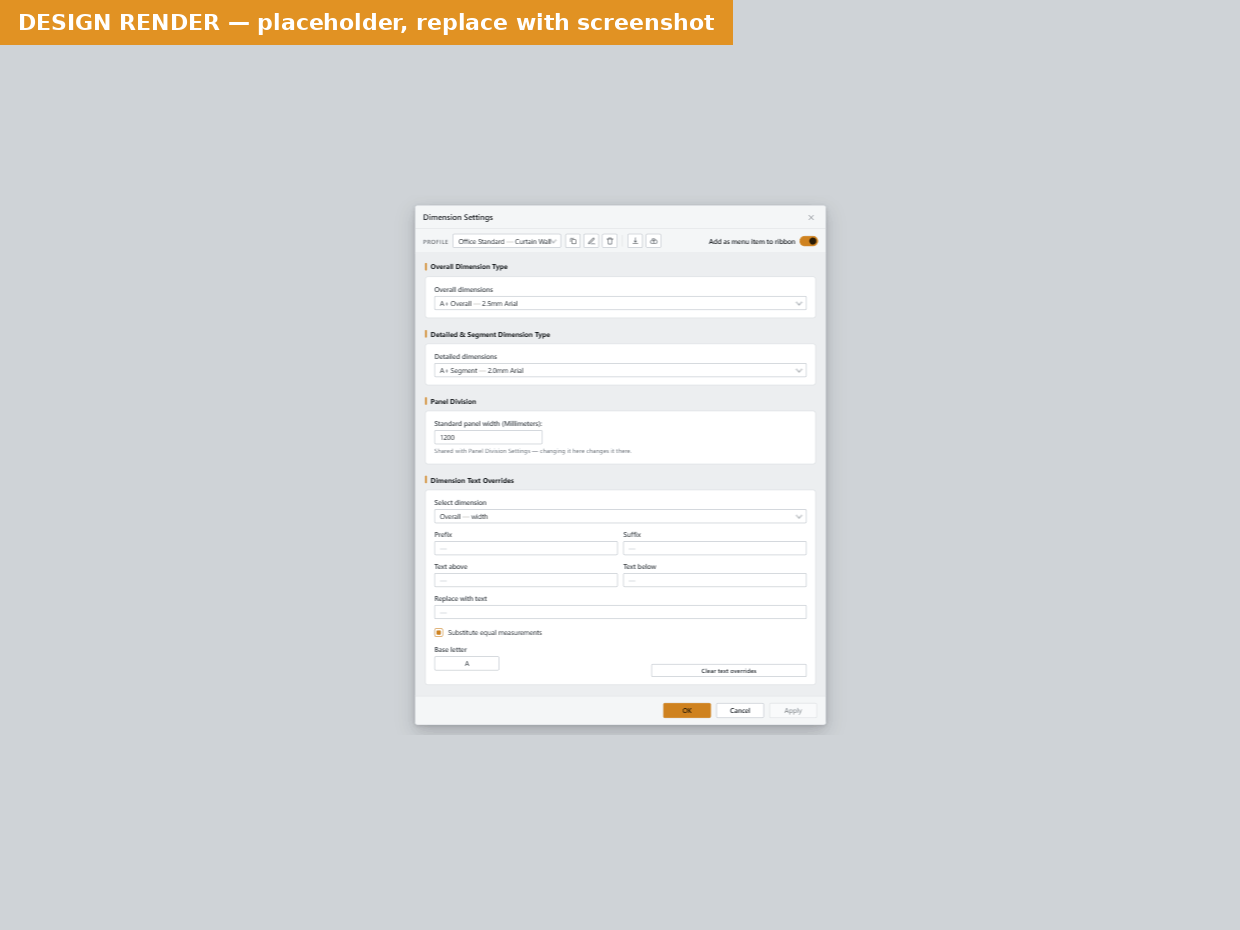 Dimension Settings — the Dimension Types tab.
Dimension Types
| Setting | What it does | Default / tip |
|---|---|---|
| Overall Dimensions | Dimension type for the total width (top) and total height (left). | No type set until you choose one (or load a profile). The lists show the project's linear dimension types. |
| Dimension line offset (next to Overall, in your project's length units) | Distance from the wall to the overall dimension lines. | Built-in starting value 400 mm. Zero or more. |
| Detailed Dimensions | Dimension type for the panel-by-panel chains below and to the right of the wall. | Required. |
| Dimension line offset (next to Detailed) | Distance from the wall to the detailed dimension lines. | Built-in starting value 200 mm. |
| Segment Dimensions | Dimension type for the glass-segment chain. | Required. If a profile has no segment type stored, the detailed type is shown and used. |
| Dimension line offset (next to Segment) | Distance from the wall to the segment dimension line. | Built-in starting value 300 mm — between the detailed (200) and the overall (400) so the three lines do not collide. |
Tip — Offsets are distances in the model, not on paper. At 1:50, a 400 mm offset is 8 mm on the sheet. Keep the order detailed < segment < overall so the chains stack neatly.
Standard Panel Size
| Setting | What it does | Default / tip |
|---|---|---|
| Standard panel width (in your project's length units) | Tells the text overrides which glass panels are “standard” — used by the Don't apply to: Standard panels check boxes on the next tab — and keeps standard-width panels as numbers when letter substitution is on. | Built-in starting value 800 mm. Use the same value as your panel division module (e.g. 1200), otherwise no panel will count as standard. Must be greater than 0. |
Tab: Dimension Text Overrides
This tab is the twin of the Overrides and Substitutions tab in the Create Drawing settings: same fields, same rules. Use it to add text to dimension values, replace them, or swap repeated values for letters.
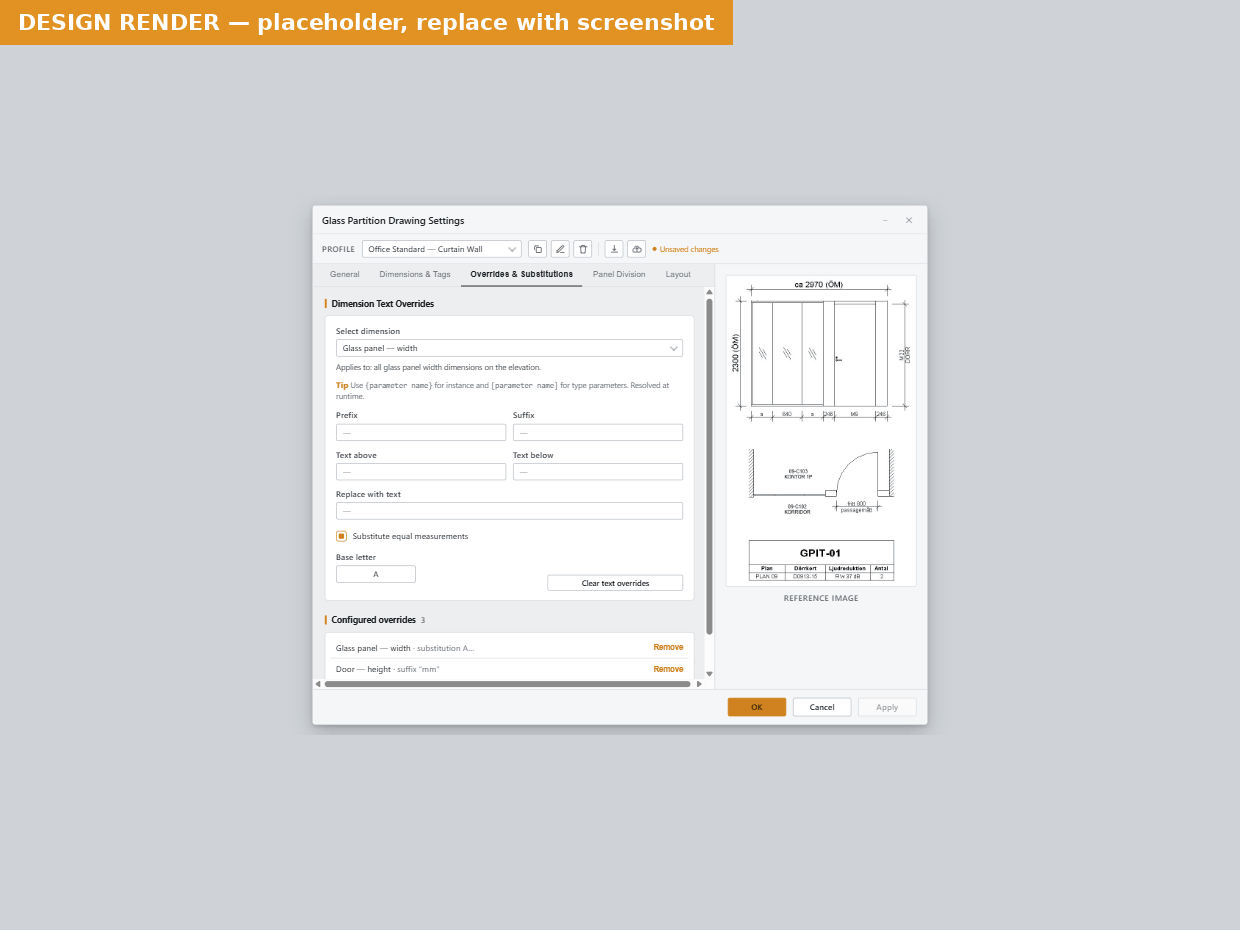 Dimension Text Overrides — an overall dimension selected.
Select Dimension Type to Override — pick which dimensions the fields below apply to. The list is grouped:
| Group | Items | Applies to |
|---|---|---|
| Overall Dimensions | Top Dimension, Left Side Dimension, Segment Dimension | The overall width, the overall height, and the glass-segment chain (Applies to any consecutive segments of panels of the same type.). |
| Glass Panel Dimensions (Applies to: your glass family) | Bottom Dimensions, Right Side Dimensions | The widths and heights of panels of the glass panel family. |
| Door Panel Dimensions (Applies to: Curtain wall door objects) | Bottom Dimensions, Right Side Dimensions | Curtain wall doors. |
| All Other Panels | Bottom Dimensions, Right Side Dimensions | Every panel that is neither a door nor of the glass family (spandrels, solid panels, embedded walls…). |
“Bottom” is the detailed chain below the wall (panel widths); “Right Side” the detailed chain on the right (panel heights). For a panel group, a line under the list repeats what it applies to, e.g. Applies to all panels of type: Glass Panel.
The tip under the list: Use {parameter name} for instance parameters and [parameter name] for type parameters. Parameters are resolved at runtime. — see Parameter values in overrides.
| Field | What it does | Example → result |
|---|---|---|
| Prefix | Text added before the value. Include a space if you want one. | ca → ca 6000 |
| Suffix | Text added after the value. | (SO) → 2970 (SO) |
| Text above | Text shown above the value. | FG above each glass width |
| Text below | Text shown below the value. | Structural opening under the top dimension |
| Replace with text | Replaces the number completely. While it has text, Prefix and Suffix are disabled. | {Mark} on door widths → D03 |
Letter substitution (door, other and glass items)
| Field | What it does | Tip |
|---|---|---|
| Substitute equal measurements | Panel widths that occur two or more times in the bottom chain are replaced with a letter — all 845 mm panels become a, all 610 mm panels b, and so on. Values that occur only once stay as numbers, and panels of exactly the standard panel width always stay as numbers. While ticked, Replace with text is disabled. | Great for long walls: the reader sees a a 1200 a a and one note explains a = 845. One switch per group (glass, door, other) — it is shared by the group's Bottom and Right Side items. |
| Base letter | The first letter used. Shared by every dimension type on the wall. | Default a. Upper-case input is used as lower-case. Letters are handed out per group, each group starting from the base letter. |
Glass panel items have an extra Don't apply to column beside each field, so you can treat standard and lettered panels differently:
| Field | Don't apply to |
|---|---|
| Prefix, Suffix, Replace with text | Standard panels — panels of the standard panel width keep their plain number. |
| Text above, Text below | Standard panels, and Substituted values — panels already shown as a letter. |
| Substitute equal measurements | Standard panels (standard-width panels are never lettered in any case). |
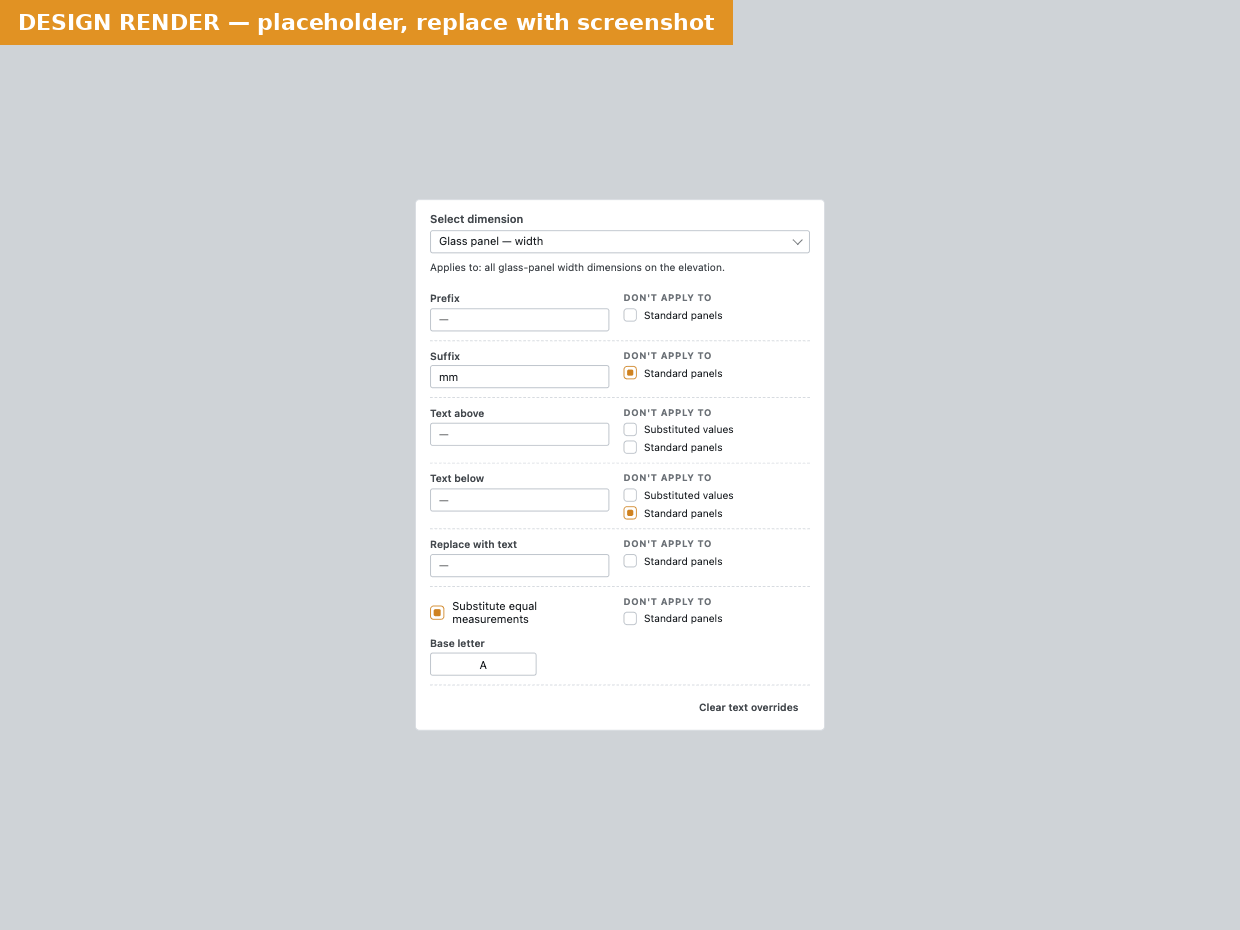 Glass panel overrides with the Don't apply to check boxes.
Clear All Text Overrides (button) — empties every override on every item, switches letter
substitution off for all groups and resets the base letter to a. There is no confirmation; click
Cancel to throw the change away.
Configured Overrides — a summary of every item that has something set, one row per item, e.g. Prefix: "ca " or Equal measurements will be substituted with a letter., with notes such as (Does not apply to standard panels). Remove on a row clears that item. With nothing set it reads No overrides configured.
Parameter values in overrides
Any override field can contain parameter tokens that are filled in when the dimensions are made:
{Parameter name}— an instance parameter, e.g.{Mark},{Comments}.[Parameter name]— a type parameter, e.g.[Type Mark],[Width].[Type]gives the type name.- Overall and segment dimensions read the parameters of the curtain wall; panel dimensions (glass, door, other) read the parameters of each panel.
- Parameter names are not case-sensitive. If a parameter does not exist or is empty, the token is left in the text as typed (e.g. {Mark}), so you can see what to fix.
Examples:
| Item | Field | Value | Result on the drawing |
|---|---|---|---|
| Top Dimension | Text above | [Type] |
The curtain wall type name above the overall width |
| Door Panel › Bottom Dimensions | Replace with text | {Mark} |
Each door width shows the door's mark instead of a number |
| Glass Panel › Bottom Dimensions | Text below | [Type Mark] |
The glass type mark under each glass width (tick Don't apply to: Standard panels to keep standard panels clean) |
| Left Side Dimension | Text below | {Comments} |
The curtain wall's Comments parameter under the overall height |
How these settings relate to Create Drawing
- The dimensions are made exactly as in Create Drawing: same dimension types, offsets, letter substitution and text overrides, applied in the same order.
- But each command has its own profiles. Changing the Create Drawing settings does not change Redimension Elevation, and the other way round.
- To make Redimension Elevation match a drawing, open Dimension Settings and use the profile bar to load the Create Drawing profile you used. It brings across the dimension types, offsets, standard panel width, overrides and substitution — and the glass panel family, which decides what counts as glass. This window has no field for the glass family; the Applies to line shows which family the current profile uses.
Footer and validation
| Button | What it does |
|---|---|
| Restore defaults… | Reloads the Default profile from your local repository into the window (you are asked to confirm). |
| OK | Checks the settings, saves them to the selected profile and closes the window. |
| Cancel | Closes without saving. If the window opened automatically at the start of the command, the command stops. |
| Apply | Saves without closing. Enabled only when there are unsaved changes; Ctrl+S does the same. |
When something is wrong, OK and Apply show a Validation Errors message — Some settings did not pass validation. — with a bullet list, and the fields concerned are outlined in red:
| Error | Fix |
|---|---|
| Overall / Detailed / Segment Dimension Type is required. | Choose a type in that list. |
| Overall / Detailed / Segment Dimension Type does not exist in the document. | The saved type was deleted or renamed — choose another, or bring it in with the profile bar's load or Transfer Settings. |
| Offset of overall / detail / segment dimension line must be zero or a positive number. | Enter a number of 0 or more. |
| Standard panel width must be a positive number. | Enter a number greater than 0. |
Tips
Tip — After Create Panel Divisions, always redimension. Dividing panels removes the wall's dimensions in the view; run Redimension Elevation in the same view to get a complete, correct set.
Tip — Replace, don't stack. Tick Clear when the view already has A+ dimensions you want to replace. Without it you get a second set on top of the first.
Tip — Hand-placed dimensions. Clear removes every dimension that measures the picked wall — including ones you added yourself to its grid lines, panels or mullions (a sill height, a setting-out dimension). Dimensions that only measure other elements stay. Add your own wall dimensions again afterwards, or untick Clear and delete the old A+ chains by hand.
Tip — Works on your own views too. Any elevation or section that shows the wall square-on can be dimensioned — not only views made by Create Drawing.
Tip — Walls with rows. On a wall split into rows (for example by a vertical pattern), the width overrides and letters follow the bottom row of full-height panels — the panels you read at floor level. Low strips along the floor are skipped.
Tip — A profile per drawing style. Make a profile with letter substitution for tender drawings and one with plain numbers for workshop drawings, and put both on the ribbon.
Messages you might see
| Message (title — headline) | What it means | What to do |
|---|---|---|
| Wrong View Type — Open an elevation or section view first. | The command was started from a view that is not an elevation or section. | Open the wall's elevation or a section and run it again. |
| Detailed Dimensions Skipped — Detailed dimensions were skipped | The wall's grid lines are not plumb and level (e.g. an angle on the instance). Only the overall dimensions were created. | Dimension the panels by hand, or tick Apply to all consecutive curtain walls to stop seeing this for the run. |
| Validation Errors — Some settings did not pass validation. | A dimension type or number in Dimension Settings is missing or invalid. | See Footer and validation. |
| Commit Changes? — Do you want to commit the changes and finish? | You pressed Esc in Multiple mode after at least one wall. | See Finishing a run. |
| Failed to create dimensions for '…' (Revit error) | Dimensions could not be made — often a dimension type that no longer exists. The whole run is undone. | Check the types in Dimension Settings; the A+ Tools log in %LOCALAPPDATA%\Aedificon\A+ for Revit 2026\ (or …2027\) has the details. |
| Credits could not be charged | The dimensions were made, but the Free/trial credit charge failed. Your work is kept. | See Licensing and credits. |
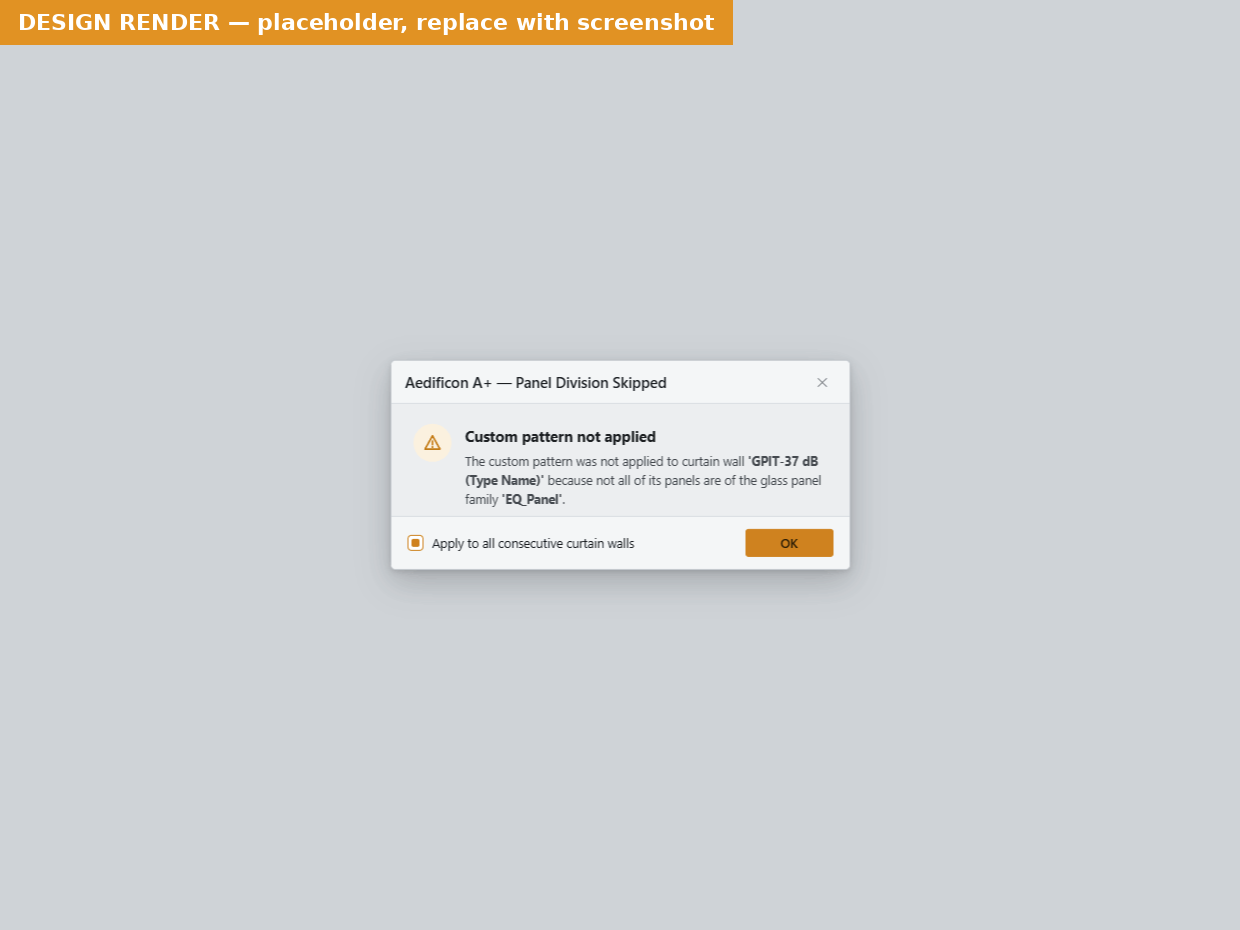 Shown when a wall's grid is angled.
 Wrong View Type.
 Validation Errors from the Dimension Settings window.
For licence, sign-in and credit messages, and every other message, see Messages and troubleshooting.
Related pages
- Create Panel Divisions — re-divide the glass first, then redimension.
- Create Drawing — the full drawing package, with the same dimension settings.
- Settings profiles and repositories — the profile bar, loading a profile from another command, ribbon menu items.
- Settings Manager
- Transfer Settings — bring missing dimension types into the project.
- Licensing and credits
- Messages and troubleshooting
Last updated 2026-10-02.